When it comes to architectural rendering, there is no magic wand with which you can wave and get an impeccable result. Whether you are an archviz specialist focused on visualisation only or an architect who does their own renderings, there are certain things to consider when making a good architectural rendering.
The magic lies in combining knowledge from different domains into one, from reading architectural projects and learning the basics of photography to mastering software. This article will briefly touch on these topics.
Communicate your client's vision
When clients hire an architect or 3D artist, they want a visionary storyteller who will breathe life into their black-and-white drawings and sketches, which can mostly be challenging to understand for those outside the industry.
Many architectural professionals do not effectively communicate the value they create in plain language. They also assume that everyone instantly grasps the immense value and brilliance of their projects. Reality is not like that; it's your job to understand and transform the drawings into vibrant and tangible realities.
How you transform those ideas into vivid images depends heavily on your client's wishes. Some clients will give you clear directions of what they expect in their renderings, and others will provide you with more artistic freedom. Though you can express your creative side more with those clients, you should always feel comfortable proposing ideas, even to the most demanding clients.

TIP: It's good practice to propose your ideas at an early stage to get a more precise direction before you waste time on something that won't be accepted. Also, during the early stage, you can show the rendering in different light conditions and try to persuade the client in what direction the rendering should go.
Capture the project's value
You will encounter different types of projects in your work, which should determine your presentation style. Some facilities, such as hospitals, laboratories, large manufacturing plants, and prisons, require being presented in the most realistic and detailed way. In those images, the function is primary, and the aesthetic aspect is secondary. Perspective, colour, and mood should resemble what you see in real life.
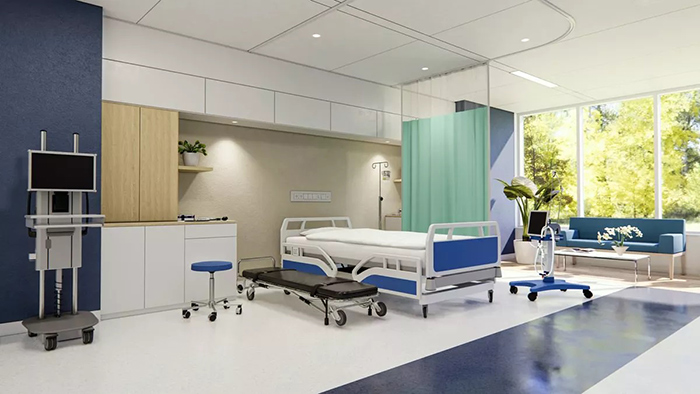
TIP: Keep the lights and colour in the most natural way, and don't use lenses and perspectives that will distort the building. Refrain from over-post-processing the images; try to keep them clean and simple.
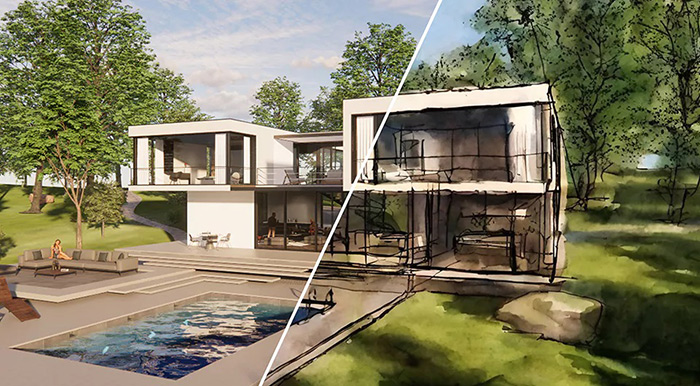
Other projects allow you to become a visualisation maestro and turn the ordinary into the extraordinary. You have the freedom to choose what and how things should be shown. You can suggest the perspective, the lighting, the colours, and the overall mood of the image to the client.
These renderings should define your style and differentiate you from others in the industry. You can focus on the main parts of the building rather than showing the entire structure. You can use lighting to emphasise the purpose of the building. You can go with any colour scheme, and colours can be oversaturated.
TIP: Although you can be as free as you want, always have references and try to create mood boards for these types of renderings. Having some direction is always better than having none.
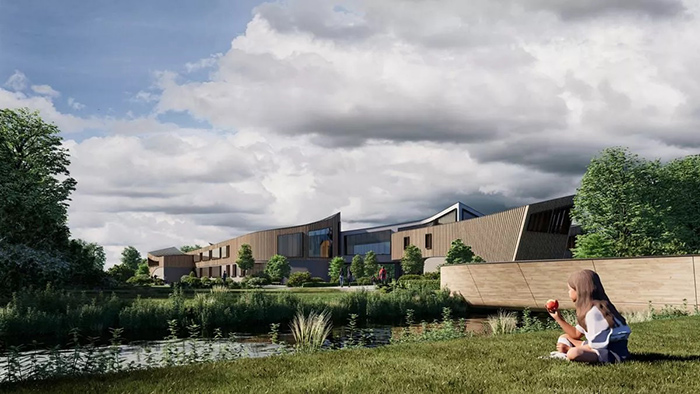
Add context and surroundings
A building's surroundings impact its design. So, showing the surroundings of the building will give viewers a specific understanding of how the building interacts with its environment. Explore the area where the building is located and try to include objects in your render that serve as reference points at the given location – it could be a railway station, a bridge, or even a historically significant structure.
The location could also be in a rural area or a forest; landscape and vegetation are crucial in those renderings. The best approach is to gather information on the vegetation types, understand their growth patterns, and then use the multi-asset placement tool to mimic their growth.
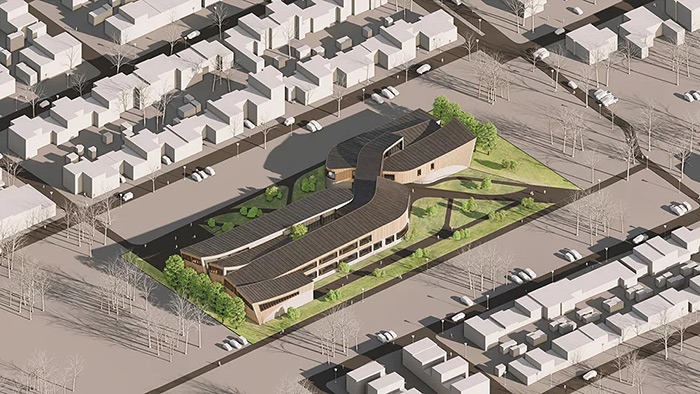
TIP: To save time, model parts of the surrounding objects you will see in your image rather than the entire building.
Fill your scene with 3D assets
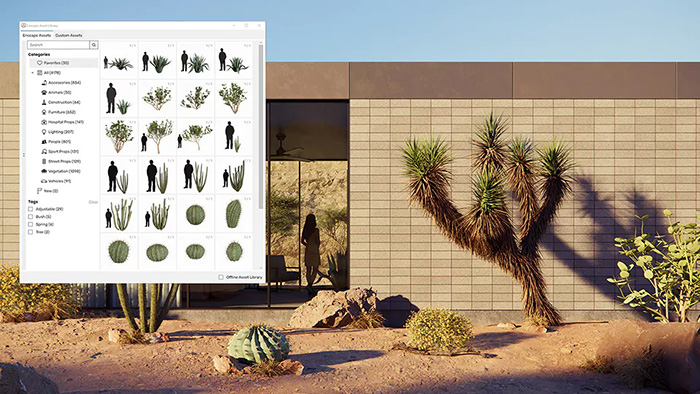
Let's say that we have the model of the building and its surroundings; the next step would be to populate the scene with 3D assets. Here are a few tips:
- An extensive library of quickly and easily accessible, well-organised 3D assets is essential.
- Don't go crazy and download everything you can find; doing so will make your life harder when you try to find the right things.
- Try to find performing assets, and avoid high poly ones because they will slow down your work.
Ultimately, feel free to create a 3D model yourself. Sometimes, you'll spend more time finding a suitable 3D model than actually modelling it. There are tutorials online to model almost anything, and you won't believe how easy it is to model even trees or bushes. And also, it could be fun, you will improve your skills, and become a better artist!
TIP: If an asset doesn't influence the design of the building/space itself, then you can get away with something similar from the library. For example, streetlights or benches don't have to match perfectly to the streetlights found on the location.
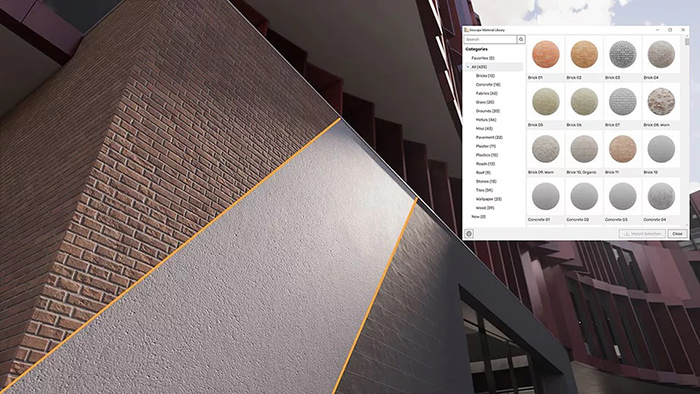
Materialise ideas
The same principles apply to materials. A well-organised library is a must but feel free to create your own materials. You can do this by going out in the real world and capturing photos of materials you like or creating them from scratch using software.
What is of crucial importance in materials (as well as 3D assets) is to question how detailed they should be. For example, an 8K texture used on a small vase that is visible at a far distance won't significantly impact your rendering.
TIP: Grab a camera, go out on a cloudy day, and photograph the materials you like in your surroundings. Post-processing software allows you to adjust these photos and incorporate them into your projects.
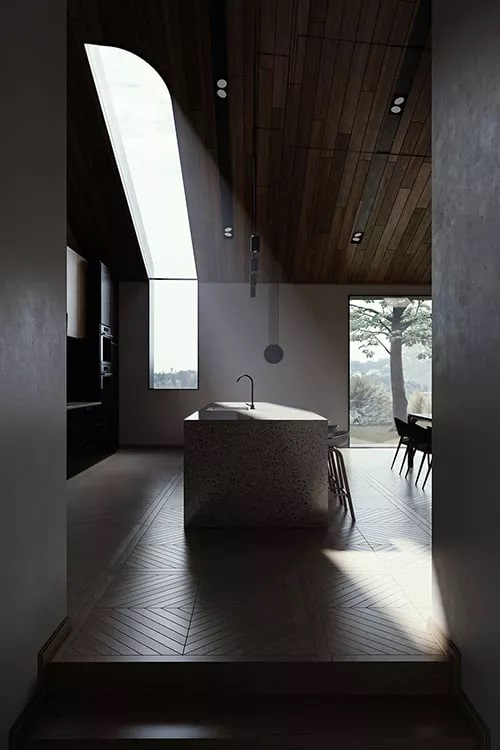
Find the perfect viewpoint
If you were a photographer, you would scout the building to find the right composition. You can do the same thing in the digital world, using real-time rendering engines. Explore the area and find the perfect viewpoint to showcase what you want and how much you want to reveal.
Too much clutter in an image created by unnecessary elements can confuse the human eye and lead to a loss of focus. Instead, the main object should be easily noticeable, and surrounding objects should contribute to making it even more intriguing.
TIP: Experiment with different frame proportions in your image. First, consider the space you are showing in your rendering, as well as whether it will be printed or presented on social platforms.
Let there be light
Most clients will ask for sunny, bright, and lively images, but you can also create a mystical look in your renderings with foggy and cloudy weather. Light changes space, transforms the spatial context and makes it appealing or repellent, seemingly larger or smaller. Utilise it to highlight specific areas, create shadows, and thereby define a certain mood. Poor lighting obscures, confuses, and produces boredom and uniformity.
TIP: Be bold and use shadows in your images. They will create depth and, if used correctly, guide the viewer's eyes to the main subject.
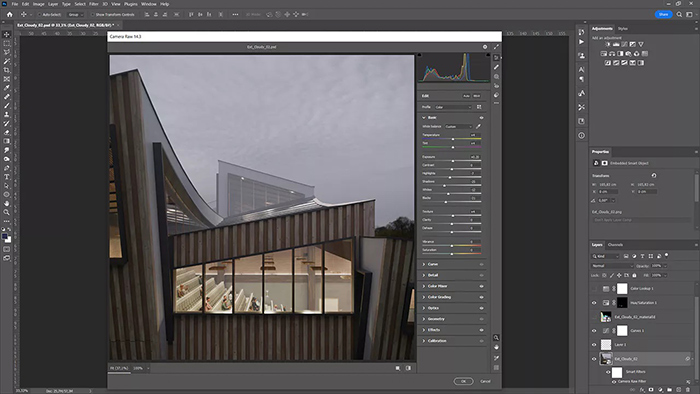
Bring everything together
We touched on composition, lighting, 3D assets, and materials, leaving us with post-production as the remaining aspect to address. It's the finishing touch that brings all elements together. The truth is, you don't need to do much. You could make some contrast and colour corrections by simply choosing some LUT presets in the image processing software of your choice.
Balance technical factors and creativity
Creating impressive architectural renderings is not a result of a magical shortcut but rather delicate and focused work between technical factors and artistic creativity. In this article, we revealed some crucial elements of light, composition, storytelling, and postproduction.
All the points and advice mentioned will help you elevate your renderings to an advanced stage. With today's development in technology and a tight-knit community of professionals who push the creative bar higher, the whole process will be even easier in the future.
